Diaphragm wall construction is very crucial for modern super structures like residential and commercial complexes with basements. These reinforced concrete walls provide the much required underground support and stability to the structure. And what ensures that these diaphragm walls are sturdy enough to keep these structures intact is Anchoring. All diaphragm wall construction companies will unanimously agree that Anchoring is one of the most important aspects of diaphragm wall construction. Here’s why…
What exactly is Anchoring a diaphragm wall?
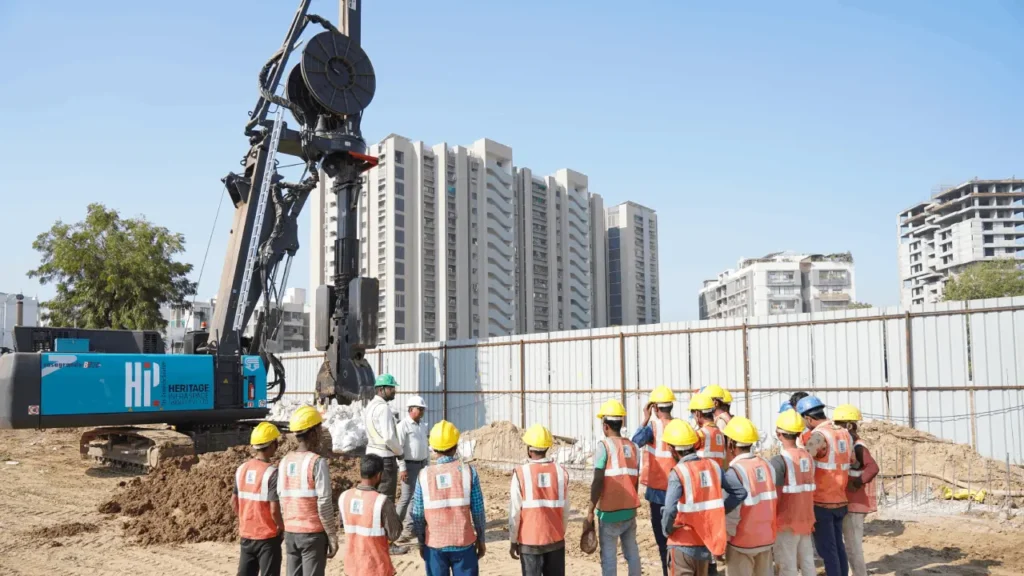
In diaphragm wall construction, ground anchor bolts are used in order to link the structural and non-structural elements of the D-wall to the concrete. The process of casting these anchors into the diaphragm wall is known as Anchoring. The Anchoring activity begins 7 days after the diaphragm wall panels are cast.
How does Anchoring help in the diaphragm wall construction?
Anchoring assists in transferring the tension and shear forces between these structural elements and lateral support to the diaphragm wall to sustain force from the top. It involves anchor bolts, steel plates, sleeves and stiffeners to form the anchor on the diaphragm wall.
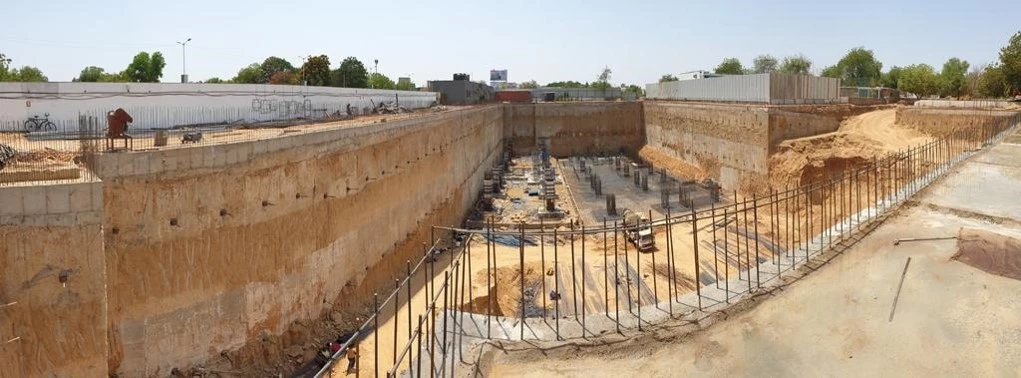
If anchoring is not done by diaphragm wall construction companies, then they have to increase the depth of the wall into the ground to almost double the size required. For instance, if the requirement is to construct a basement of 10 ft., the diaphragm wall must go deeper into the ground by 10 ft. more, in order to ensure it doesn’t collapse. Constructing a diaphragm wall without anchoring increases the cost of labor, the amount of concrete and steel used in the process, thus adding to the cost of the project.
What are the anchors used in Anchoring?
The tool used in the process of anchoring is called a Grouted Ground Anchor. There are three important elements you’ll see in an anchor, and they are Steel Tendons, Spacers and End Cone. Top civil engineering companies in India like Heritage Infraspace India Ltd used steel tendon grouted ground anchors manufactured by Tata or Usha Martin.
This is the breakdown of an Anchor that goes into the diaphragm wall

Now, these steel tendons are generally 12.7 MM wide and come in 7 ply form (7 different wires coming together to form one single tendon). The spacers, just like its name, create spaces between these wires to ensure that they do not touch each other and that the cement flowing into the sleeve of the anchor is regulated.
The End Cone, is a conical shaped protector attached on the interior end of the anchor, which protects the wires from touching the soil base.
The Anchoring process
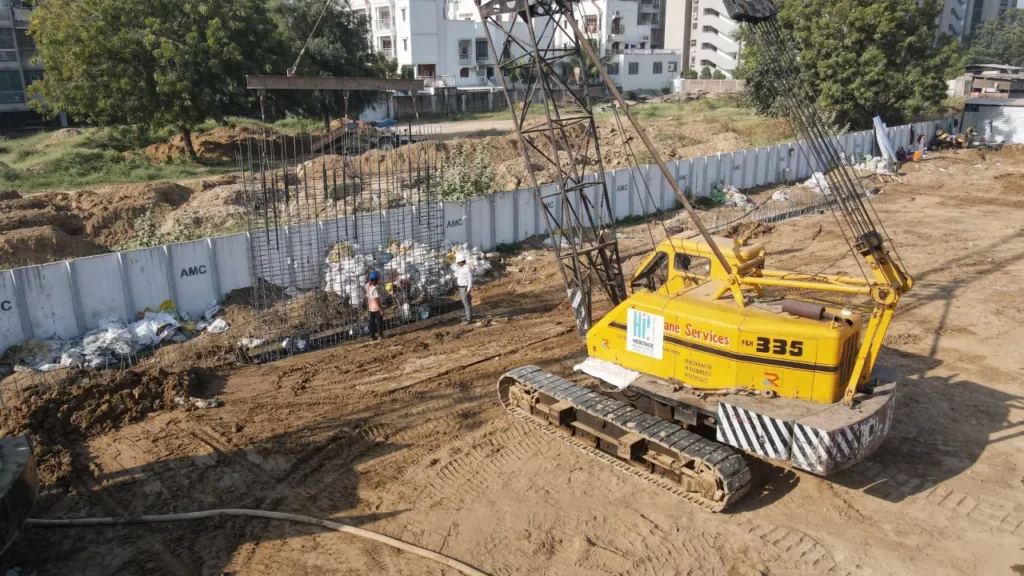
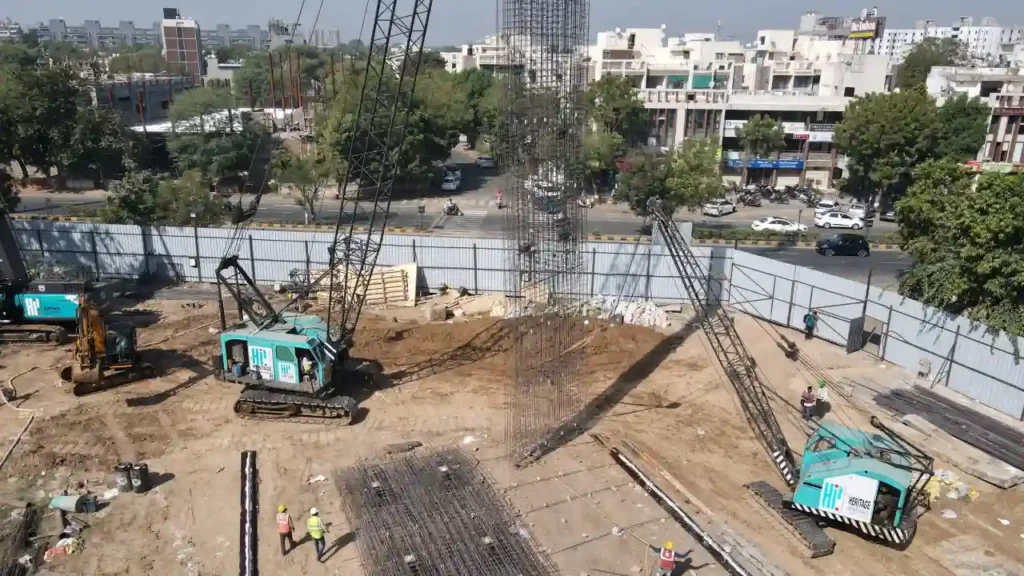
Anchoring is done post casting of the diaphragm wall. There are multiple levels of anchoring, with one anchor level in every basement. When the diaphragm wall cages are made, there are slots left open in equal distance on them. They are called anchoring sleeves. The distance maintained between them is ideally 5 meters. But the depth can be increased, given the quality of the soil the diaphragm wall construction companies are dealing with.
A drill rig is used to drill boreholes of 150 to 180 mm, at 15 to 30 degrees and the anchor tendon is put into the hole in the center. Upon completion of boring, the borehole is cleaned through compressed air. A low relaxation prestressed steel (LRPC) strand is inserted into the bore and the anchor is grouted. The anchor head is then pre-tensioned by jacking after 7 to 10 days, and the anchor heads are set in place. The anchor is later distressed after the slab casting is done.
The pre application process
The anchor is usually 15 meters, of which an approximate 10 meters are considered to be bonded length, and the remaining is called Unbonded or free length. An Emery paper is used to clean the steel tendons first. The Araldite and hardener is applied on to it, followed by quad sand before the tendons dry up, so that the sand sticks to it. The free length area is then covered with a sheath. HDPE pipe or duct is added inside the sleeve.
Stressing: Multi-pull jacks pull out the unbounded part of tendons, out of the PVC sleeves. The distances are in millimeters. Wedge using the grips and bearing plate. Once the excavation is done, the slabs are placed, HIPL comes into the picture, this time de-stress the anchors on the walls. Compressors to pull out the soil with 1100 CFM power.

Equipment used
HIPL uses the advanced anchoring rigs, Casagrande C6, can drill up to 8 inches instead of the regular 6 inches, 4 of them, Long Boom Excavators, Conventional Anchoring Rigs. If the structural consultant permits, then we can add 2 anchors in 6 inches, saving cost for the client, value based engineering. Higher slopes will not pull the soil out, as a result, the Casagrande C6 has to be used.
HIPL fixes anywhere between 15 to 20 anchors on its D-walls any day. We use the most modern machinery and anchoring rigs to conduct our anchoring activity. HIPL’s engineers and ground workers take about 4 days to put in all the anchors in a single basement diaphragm wall project, and about 7 to 10 days for stressing and de-stressing the anchors.
Drop us an email on info@oldheritage.4wheelsmediaworks.in to know more about what we do, including concrete diaphragm walls and deep basement diaphragm walls, and how we could help your next big project become a landmark of strong and safe construction.